

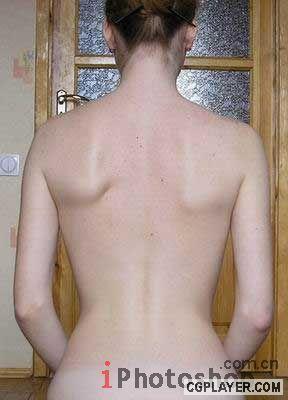

Open the girl skin photo: File -Open (ctrl+o)
打开一张女孩子的图片:点击文件-打开(ctrl+O)。
Outline it along the contour, using Polygonal Lasso Tool. Copy it: Edit ?Copy (ctrl+c) and insert it on a new layer, using the next command Edit ?Paste (ctrl+v). Erase the previous layer, using the button of fast erasing on the Layers window.
使用多边形套索工具选出MM的轮廓,复制,粘贴到新的层中,将原始图层里的东西全部擦除掉,可以换个大大的橡皮擦来擦~
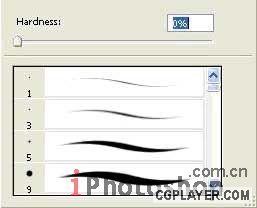
Take another instrument (Smudge Tool), preliminary setting brush hardness on 0% and paint the birthmarks and skin unevenness.
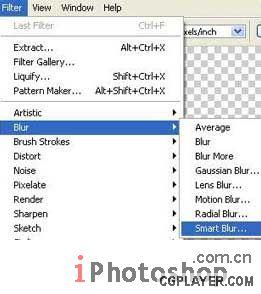
Apply Smart Blur filter.
使用特殊模糊。
Make the layer lighter using the command Image ?Adjustments ?Desaturate (shift+ctrl+u).
点击图像-调整-饱和度(shift+ctrl+u)将图像调亮一点。

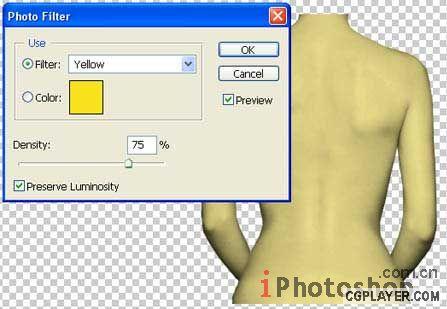
Give a tone to the skin, using a color filter: Image ?Adjustments ?Photo Filter. Choose the yellow color.
点击图像-调整-照片滤镜,选择黄色,让北部的色调柔和一些~
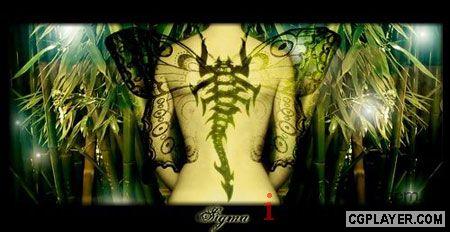
Take two tattoo pictures and place each of them on a new layer.
找两张纹身的图样,我们找的当然是蝴蝶和蝎子~将它们各自放到新的图层中.