
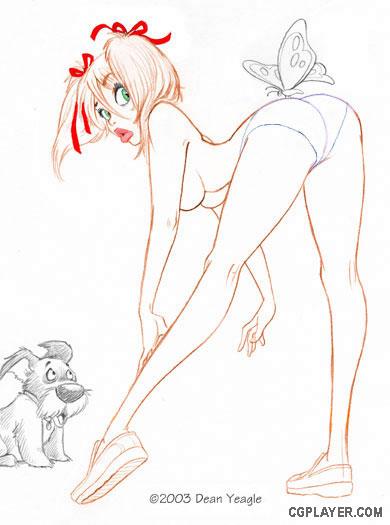
ALso red for the ribbons, green for the eyes, and a grayed blue for her underpants (NOTE: well, you probably already have...I've removed the dress, realizing I'll want to make it slightly transparent, and so will need another leverl for that.)
»№УРЛҝҙшУГәмЙ«Ј¬СЫҫҰУГВМЙ«Ј¬»№УРДЪТВҝгУГА¶»ТЙ«ЈЁЧўТвЈә»№УРЈ¬ДгҝЙДЬТСҫӯ...ОТТСҫӯИҘіэБЛТВ·юЈ¬ТвК¶өҪОТТӘ°СЛьЕӘөГУРТ»өгНёГчЈ¬ЛщТФОӘҙЛРиТӘБнТ»ІгЈ©ЎЈ
НјЖ¬ЖЯЈә
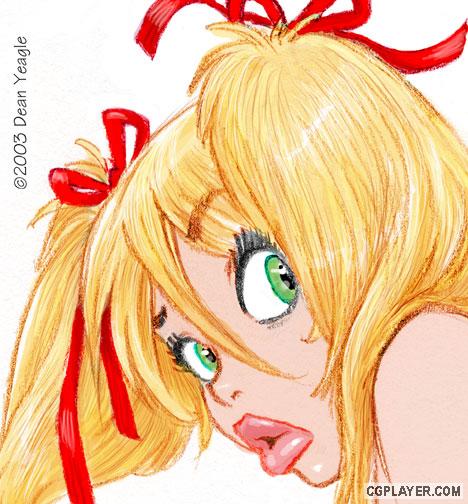
I have also slightly adjusted her head - it looked a little skewed to me this morning ( a night's sleep changes everything), so I simply selected it, chose Distort, and skewed it back the way I think it should be. Looks right now. Until morning, anyway.
ОТ»№ЙФОўөчХыБЛЛэөДН·——ҪсФзЛьҝҙЖрАҙУРөг¶щіҜОТХвНбРұЈЁЛҜТ»НнЙПёДұдБЛЛщУРөДКВЗйЕ¶Ј©Ј¬ЛщТФОТәЬјтөҘөШСЎФсН·ІҝЈ¬И»әуСЎФс“ЕӨЗъ”Ј¬И»әу°СЛьіҜОТИПОӘУҰёГөД·ҪПтЗгРұ»ШАҙЎЈПЦФЪҝҙҝҙҫН¶ФВЮЎЈОЮВЫИзәОЈ¬өҪФзіҝКұКЗХвСщЎЈ
Then I do the hair, eyes, lips, and ribbons - anything that will be a different color than skin. Why? No particular reason, it's just what I do. I'll use white for highlights, at varying opacity, and the same yellow as the hair, using Multiply, to darken other areas of the hair, as well as some red-brown and orange. Then I pick a skin color, starting with a warm, slightly yellowish tan, at perhaps 35%, and use the bucket tool to fill the face. Then I add a little magenta, but not too much to make it cool - 15%, and then in this case, that looked too dark, so I added some white.
И»әуОТҙҰАнН··ўЎўСЫҫҰЎўЧмҙҪ»№УРЛҝҙш——ЛщУРөД¶јәНЖӨ·фСХЙ«І»Н¬ЎЈОӘКІГҙЈҝГ»УРМШКвФӯТтЈ¬ОТҫНКЗХвГҙЧцБЛЯВЎЈОТТӘКЗУГ°ЧЙ«ЧчОӘёЯ№вЈ¬ұд»ҜІ»НёГч¶ИЈ¬ФЩК№УГәНН··ўТ»СщөД»ЖЙ«Ј¬УҰУГMultiplyЈ¬°ө»ҜН··ўөДЖдЛьІҝ·ЦЈ¬ҫНПсКЗәмЧШЙ«әНіИЙ«ЎЈИ»әуОТСЎБЛТ»ёцЖӨ·фөДСХЙ«Ј¬ЕҜЙ«өчөДОўОў·ў»ЖөДЧШәЦЙ«Ј¬ҙуёЕ35%Ј¬И»әуК№УГНҝБПН°№ӨҫЯҝӘКјМоідБіІҝЎЈФЩНщәуЈ¬ОТјУБЛТ»Р©Ж·әмЙ«Ј¬І»№эІ»¶аЈ¬К№Ц®АдТ»Р©——15%Ј¬ФЪХвёцАэЧУЦРҝҙЖрАҙУРР©°өБЛЈ¬ЛщТФОТјУБЛТ»Р©°ЧЙ«ЎЈ
НјЖ¬°ЛЈә
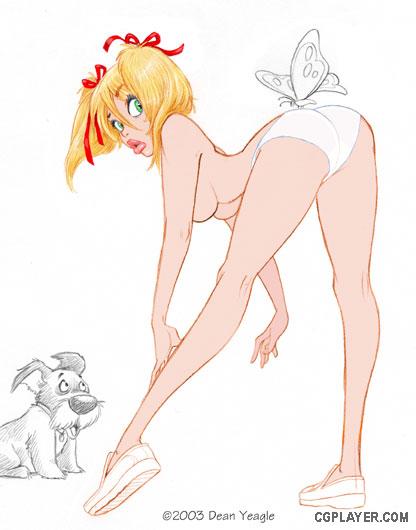
Then I sample the face, and use the bucket (assuming all the lines are closed - which they weren't) to fill the rest of the body, and a slight blue with a bit of the flesh color for the pants.
ОТФЪБіІҝИЎСщЈ¬К№УГУНЖбН°ЈЁјЩЙиЛщУРөДПЯМх¶јұХәПБЛ——ЖдКөІ»»бЈ©АҙМоідКЈУаөДЙнМеІҝ·ЦЈ¬¶МҝгК№УГҙшТ»Р©ИвЙ«өДөӯА¶Й«ЎЈ
НјЖ¬ҫЕЈә